
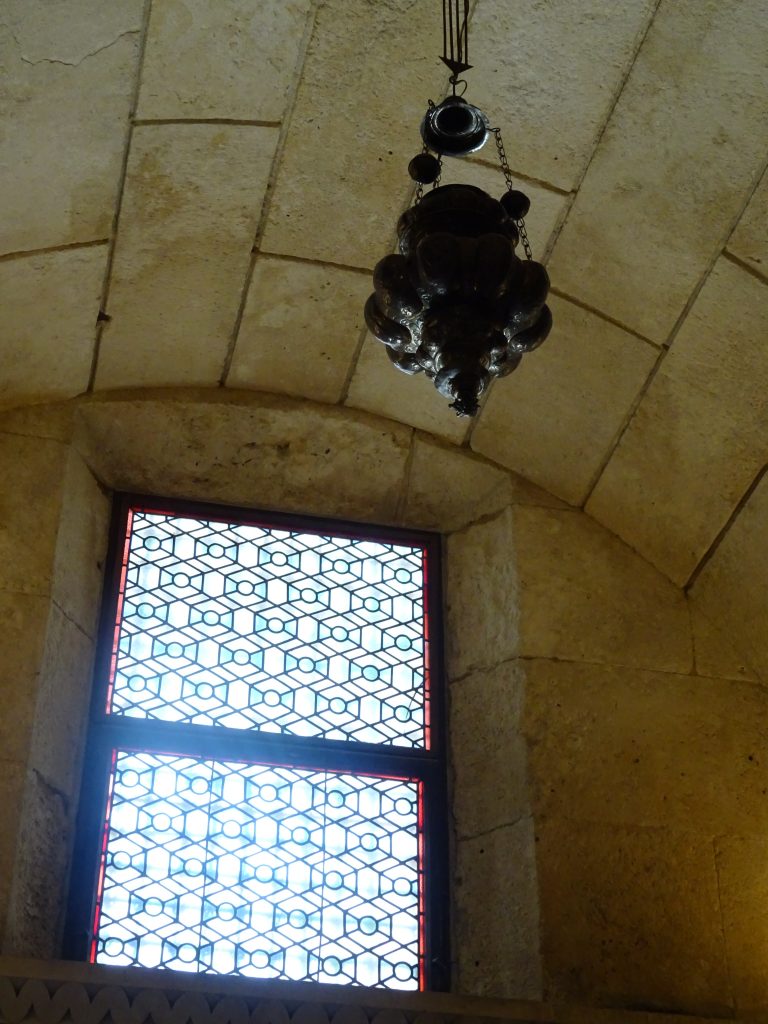
One of the elements that I saw as a prominent feature in Mediterranean palaces were leaded and/or stained glass windows. There are also great tie ins between the palaces and the churches using leaded and colored glass, and I liked the connection to Christmas. You can read more on the history here.
The Xmas Museum has very contemporary floor to (almost) ceiling windows, so this gave me an opportunity to create a pattern on a blank slate. The Dining room has three windows in three different sizes, with no muntins dividing the panes.
I did some research and found that the Oracal® Orafol 631 temporary adhesive vinyl came in transparent! From my research I also found that alcohol based inks were transparent in nature and were shown to have good adhesion to vinyl.
My first plan was to freeform a Baroque-like design with lots of scrolls and such, but I was afraid the window would read more like a painting than a leaded window. Also, as per my example picture, I saw more linear and geometric patterns in the palace windows, with the more figurative and decorative windows in the churches. This decision led me to the advantage of using a stencil to make the drawing easier.
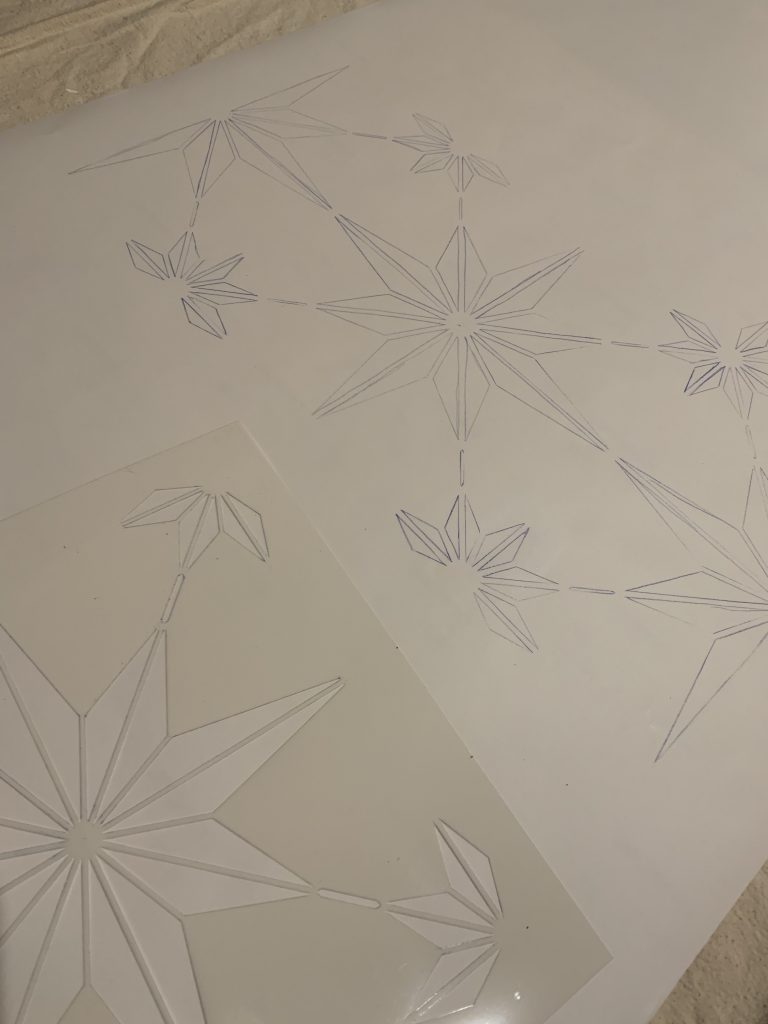
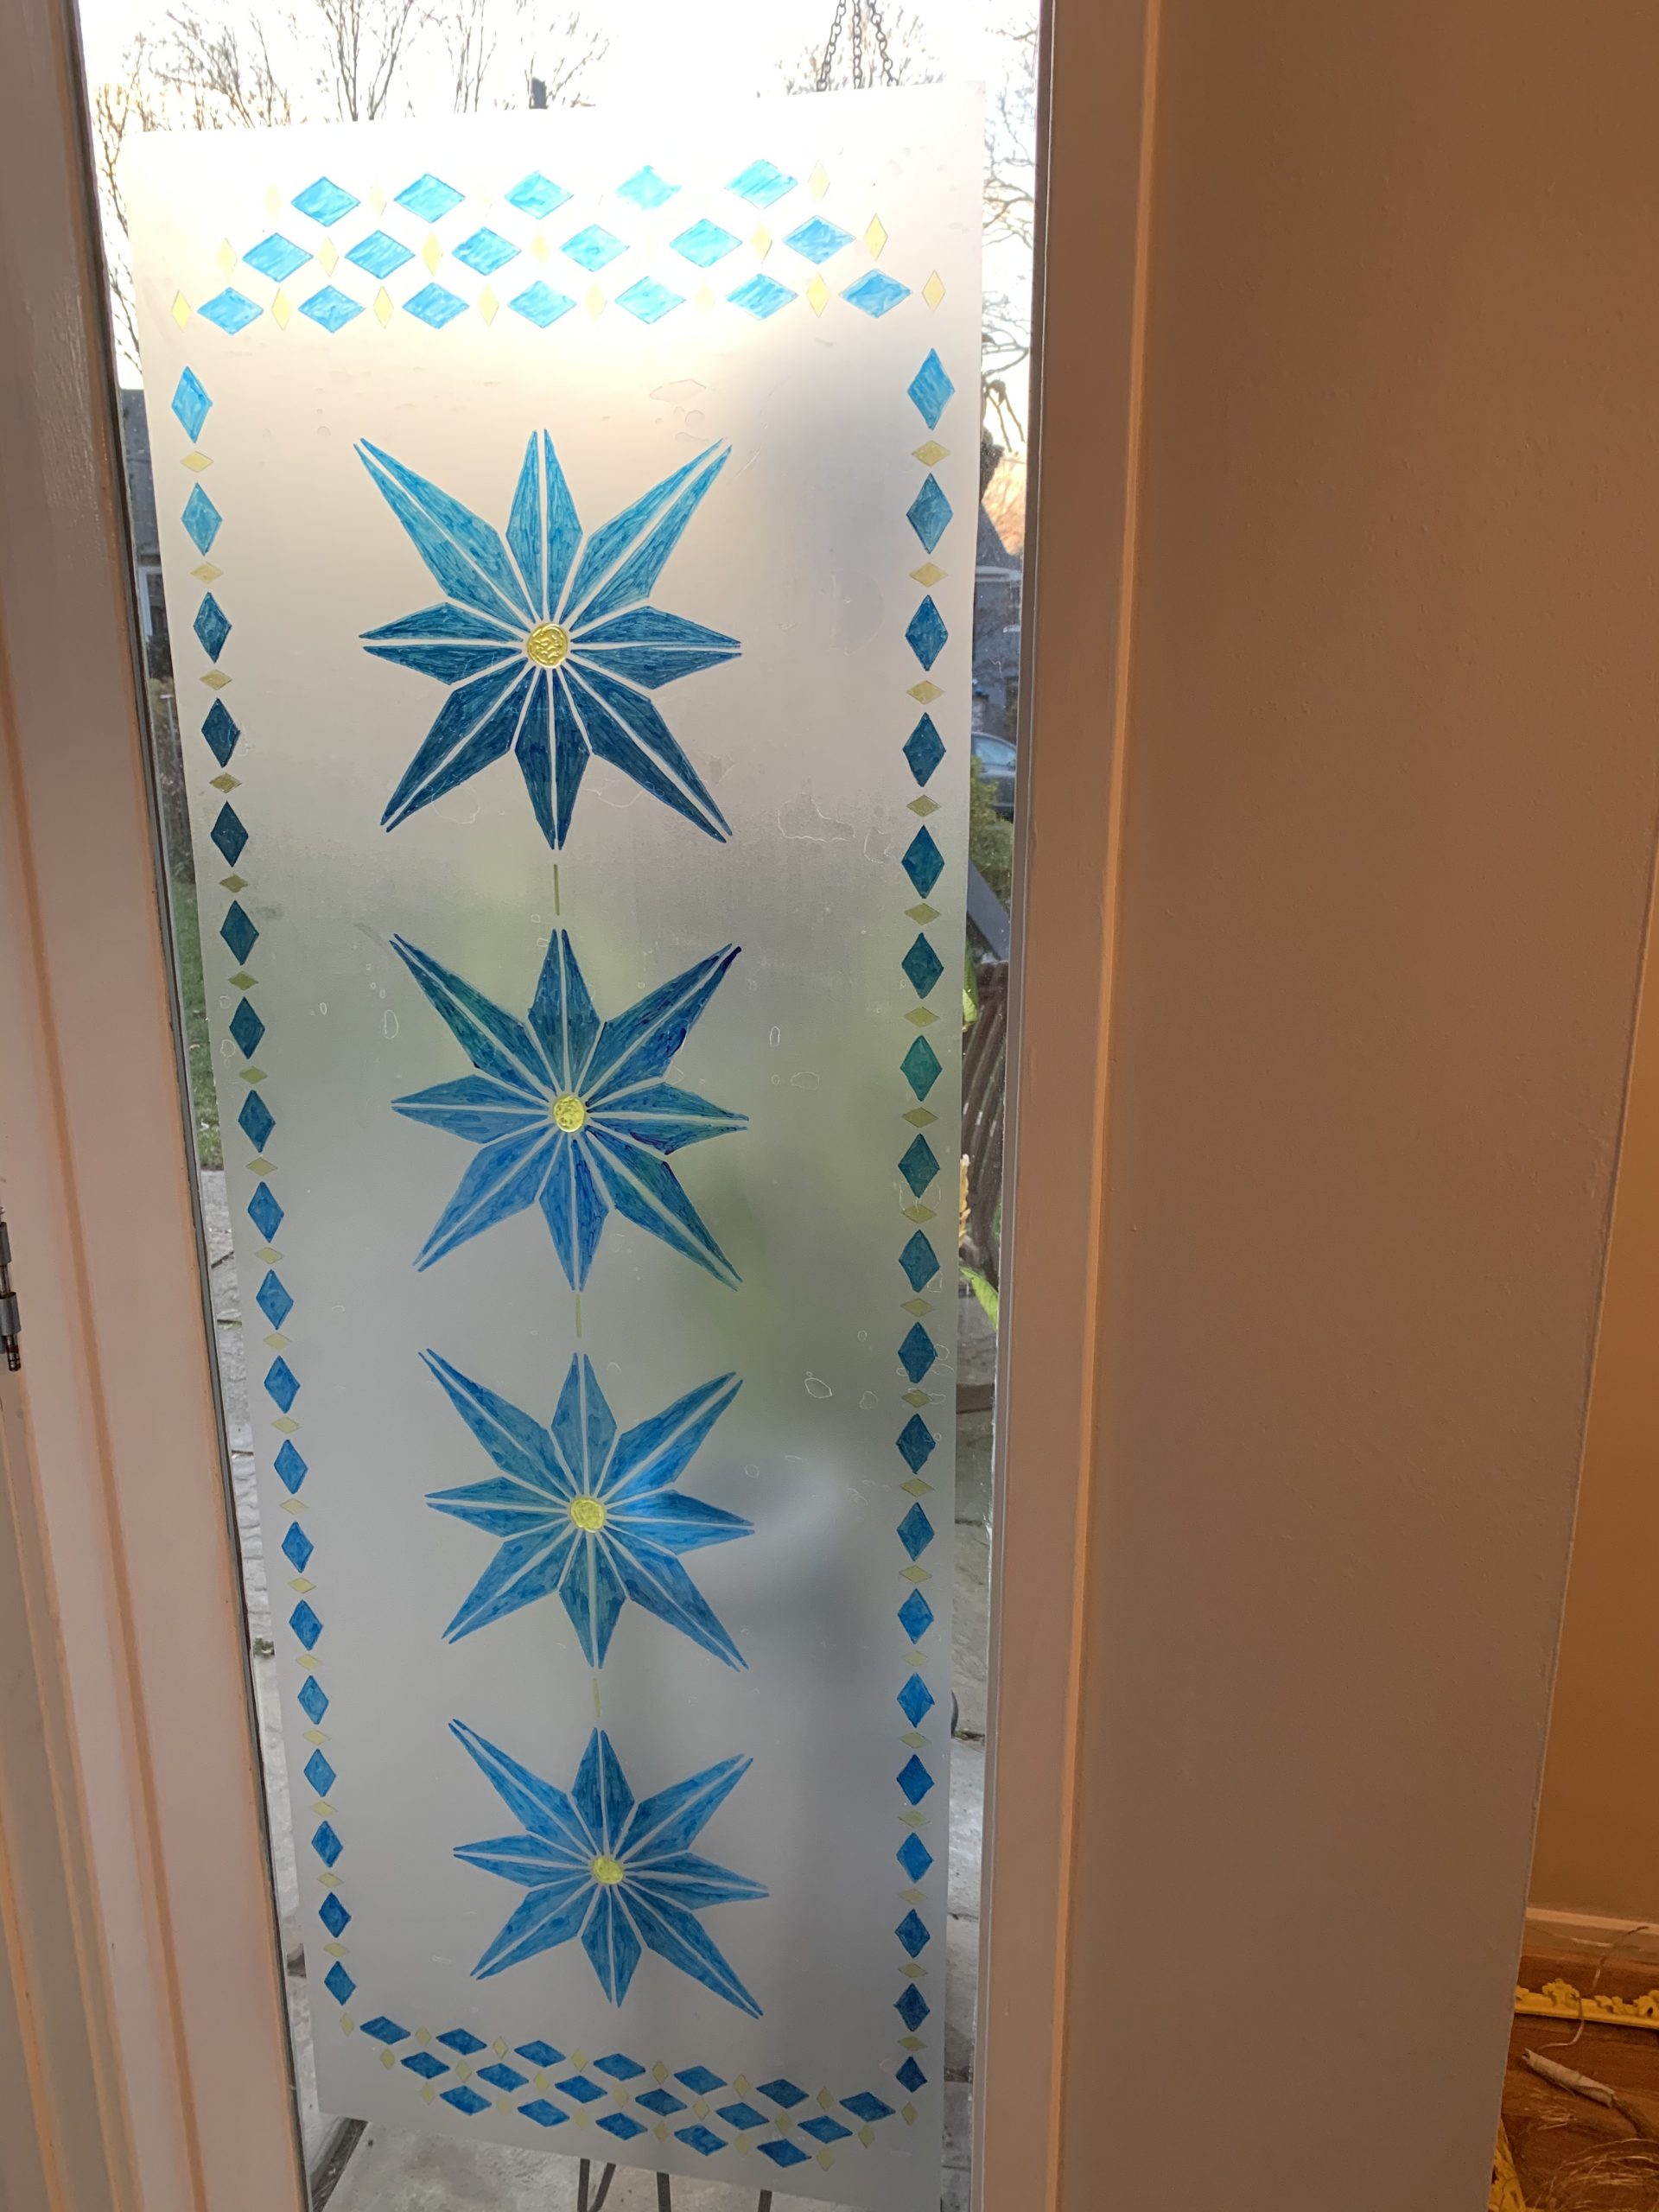
While searching for stencils online I came across Royal Design Studio Stencils (it was meant to be!) and decided on their Zelij Diamonds and You’re a Star stencils that I would combine to pattern my window designs. The star seemed very Bethlehem star to me, and I like diamonds for their geometric shape and nod to luxury.
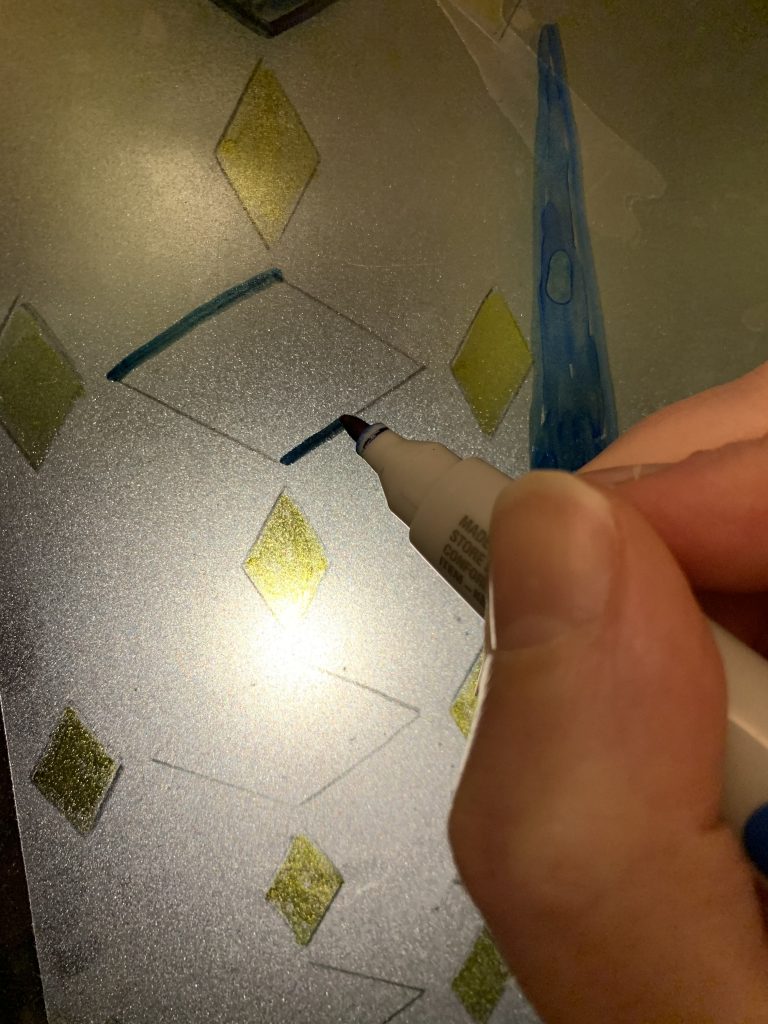
For the large window I decided to stencil and color in the panel on the floor, and then transfer it to the window. I cut the panel to size, marked my centers, and then started the stencil in the middle by outlining the shapes with a wax pencil.
Next I used alcohol Ink markers to trace the outlines and color in the shapes. I used a technique of using a cotton swab to put drops of alcohol on areas of the starts to give them an interesting dot pattern. One I was done with the star pattern I transferred it to the window.
Well, it didn’t transfer well. The inks were dry and did not smear when applying to the window. But I got a lot of bubbles that I could not squeegee out, like I could when I applied vinyl decals to my wall. My guess is that because the window was so smooth it adhered too well. Poking the bubbles with a pin and smoothing out seemed to work at first, but then the bubbles returned.
Disappointed but determined I continued coloring in the diamond patterns. You can see one of the large bubbles across the tip of the star on the right:
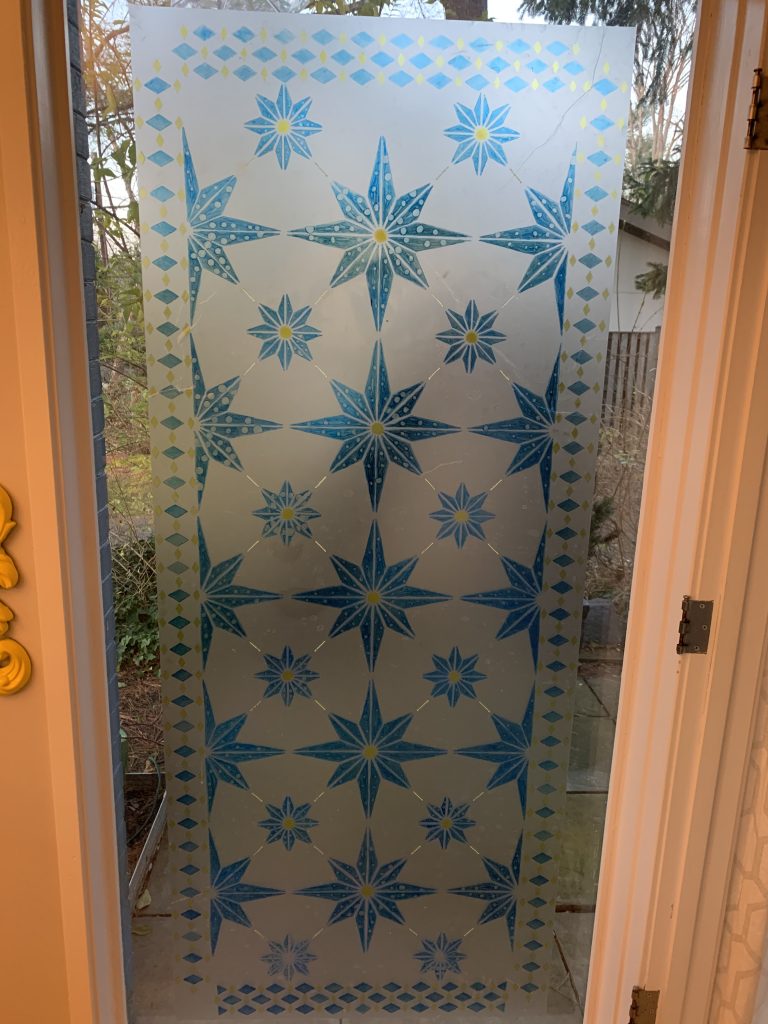
When all was done and as long as you looked at it straight on, it came out perfect 🙂
I decided to draw and color the next largest panel on the window (better for the neck and back). Less bubbles since the panel was a bit more manageable, and easier for me to draw and color. I modified the overall pattern to fit the smaller dimensions of this window.


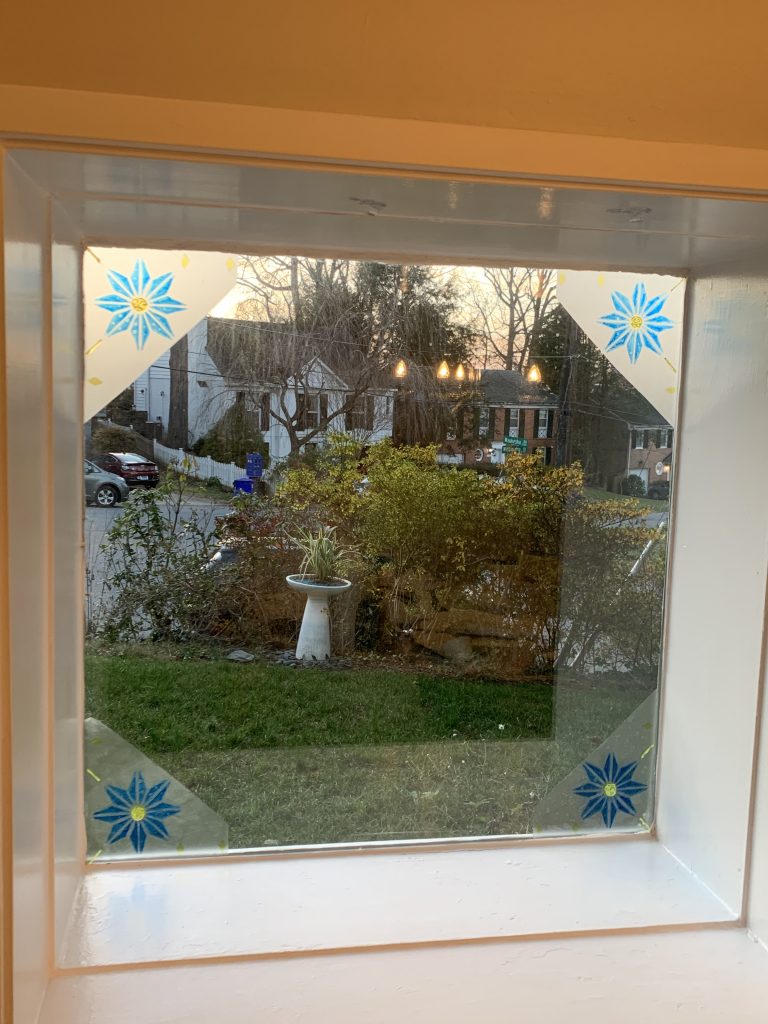
For the picture window I used the smaller starts and just created corner decals.
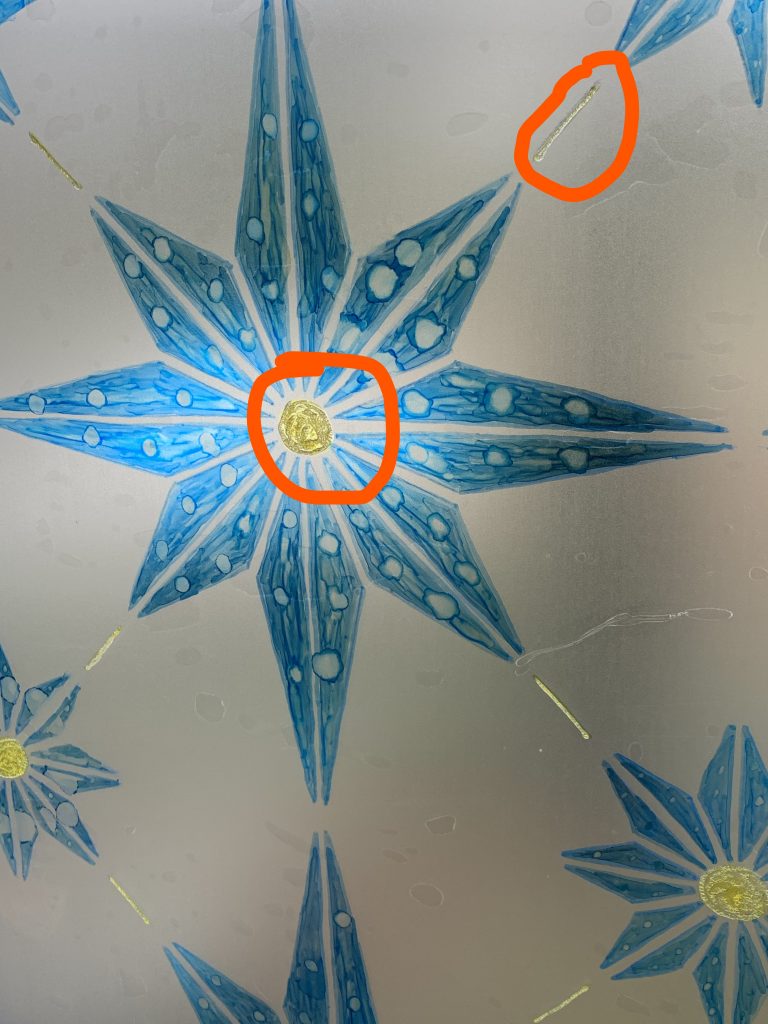
After seeing them against the light, I decided to add some more light refracting details. I went over the star centers and connecting lines with a gel marker, and now these areas really illuminate.
So with a little difficulty the palace windows are complete.
NEXT UP: Adding an unexpected fabric treatment.